This exercise is excerpted from Noble Desktop’s past Adobe Illustrator training materials and is compatible with Illustrator updates through 2020. To learn current skills in Illustrator, check out our Illustrator Bootcamp and graphic design classes in NYC and live online.
Note: These materials are provided to give prospective students a sense of how we structure our class exercises and supplementary materials. During the course, you will get access to the accompanying class files, live instructor demonstrations, and hands-on instruction.
Topics covered in this Illustrator tutorial:
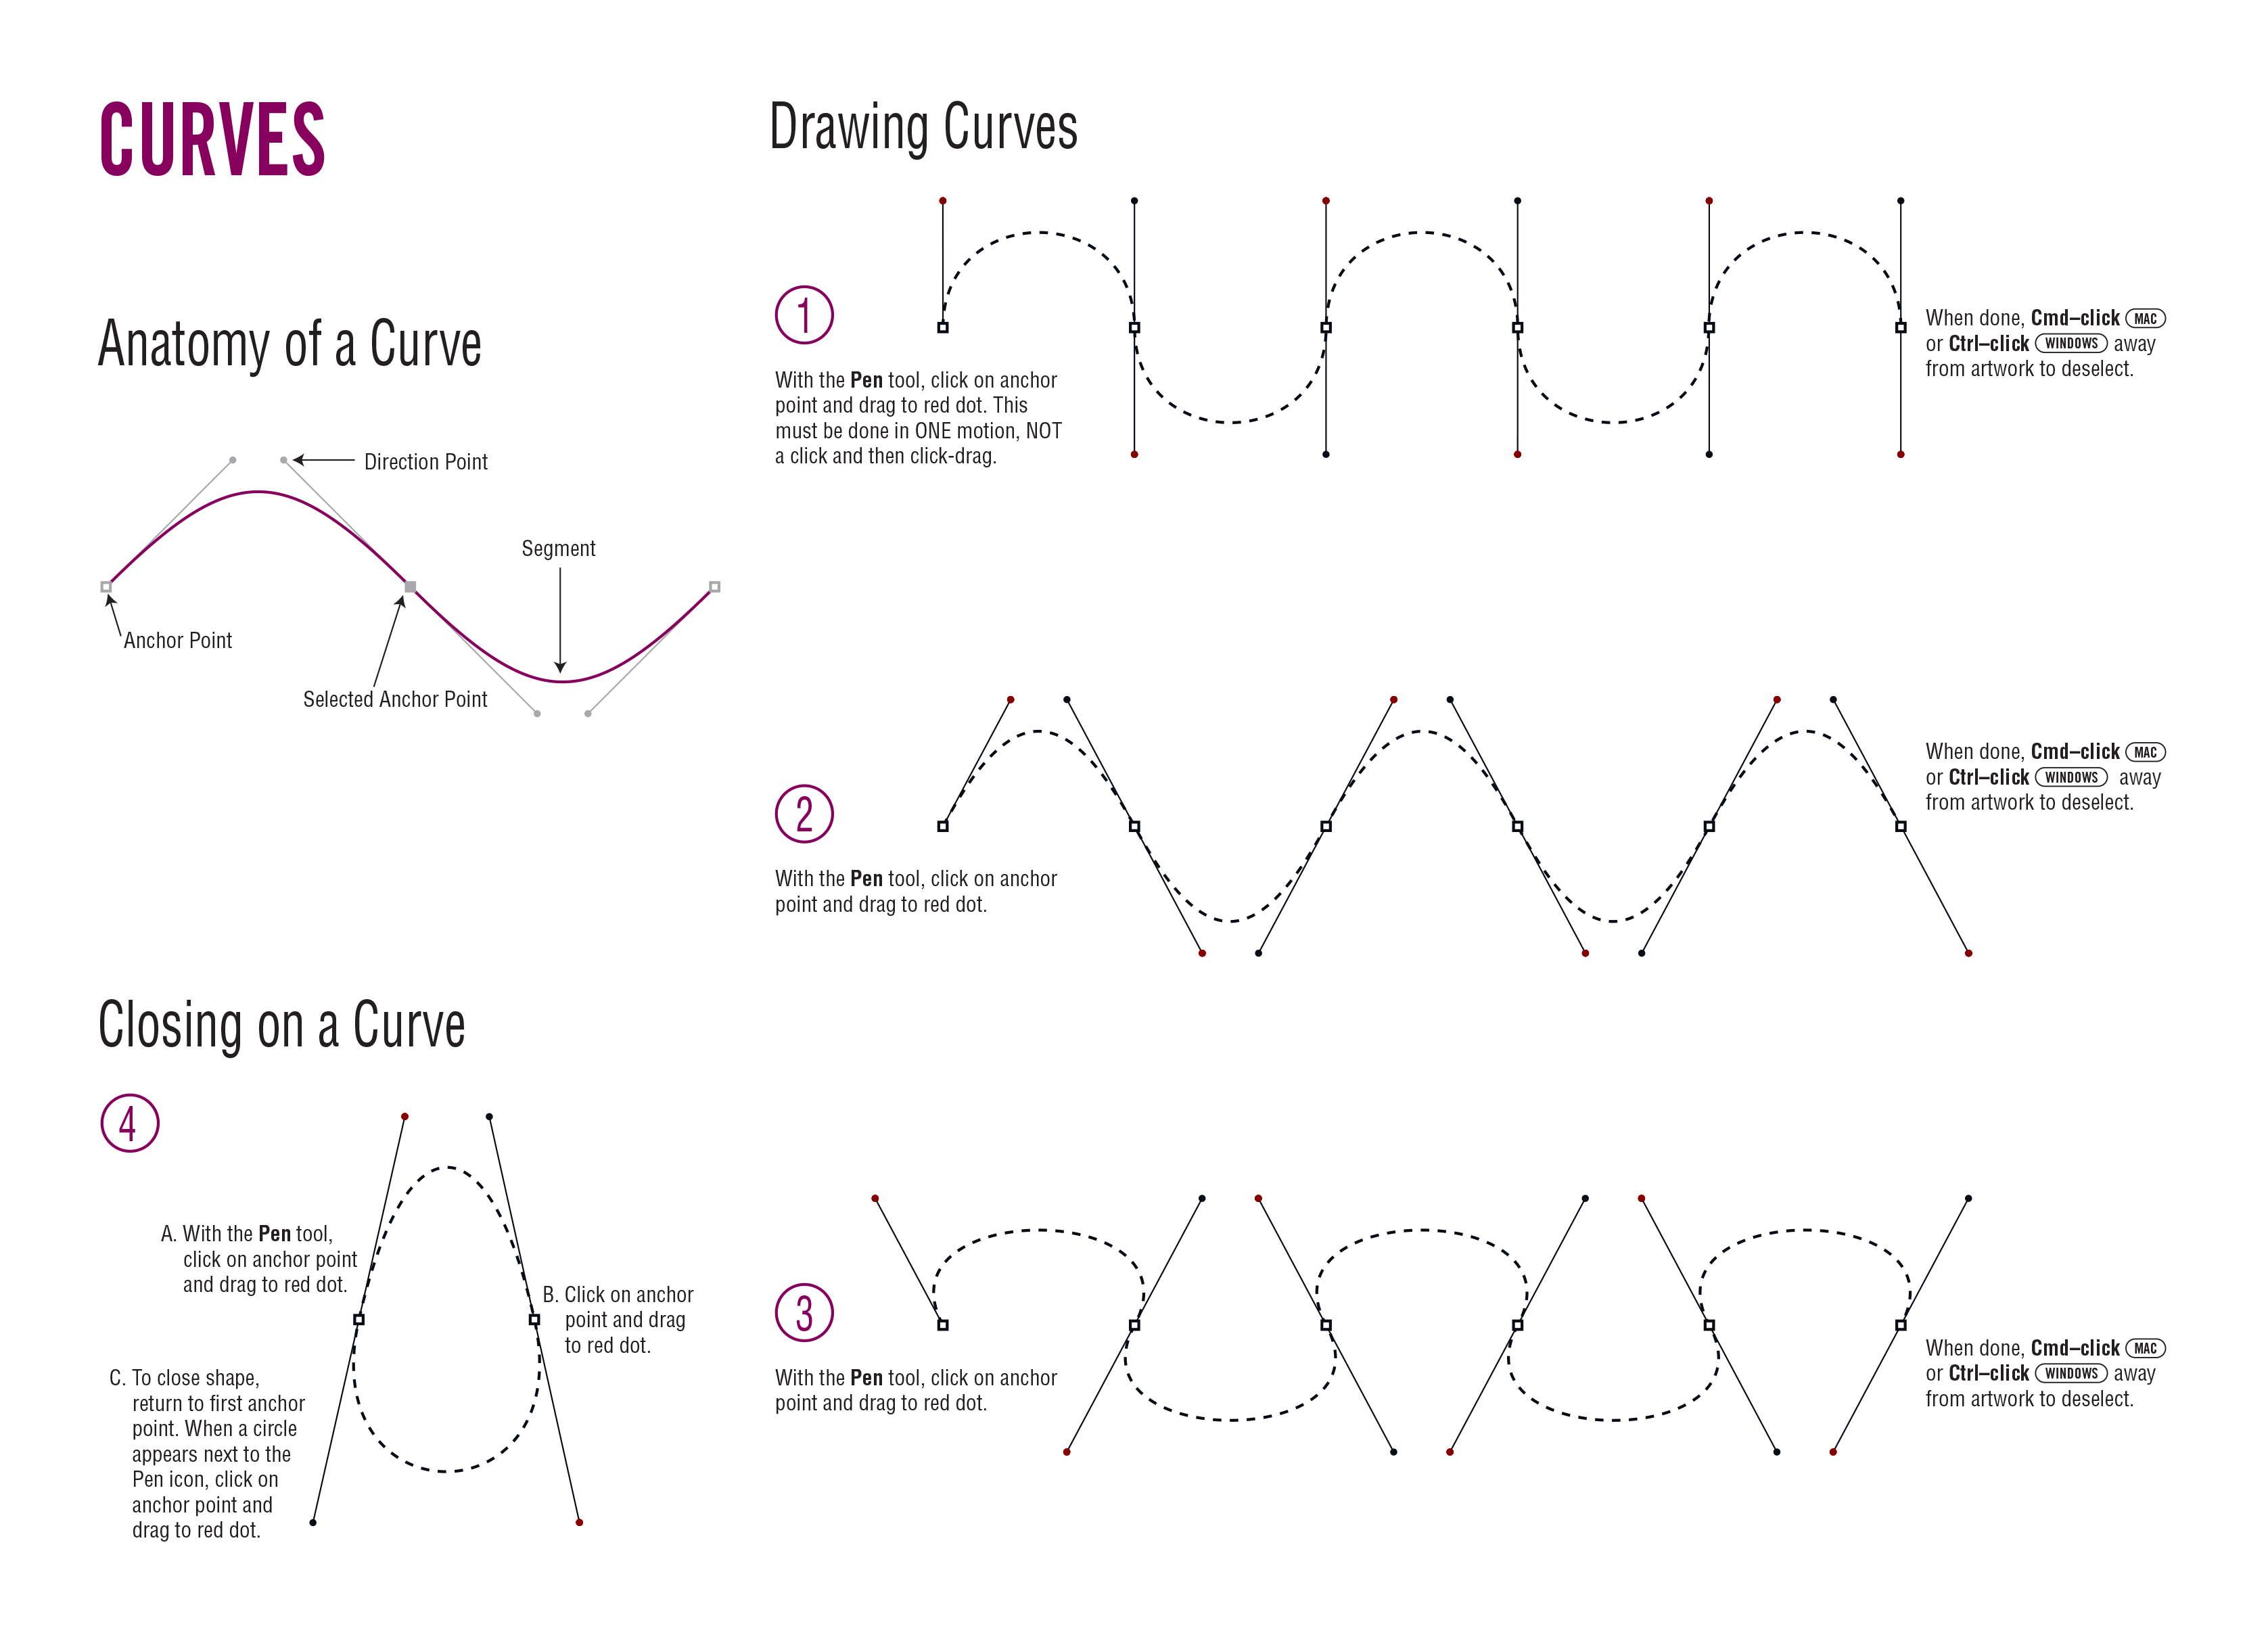
Drawing curves with the Pen tool, Anchor points & direction points, Default fill & stroke
Exercise Preview
Exercise Overview
Continuing in our quest for mastery of the Pen tool  , this exercise walks you through creating curved lines and shapes.
From the Illustrator Class folder, open the file Curves Template.ai.
Select File > Save As, naming the file yourname-Curves.ai.
Click Save. In the dialog that appears, leave the default options checked
and click OK.In the Tools panel, click the Default Fill and Stroke button
 .
.In the Tools panel, click the Fill icon and then click the None button
 .
.Follow the on-screen directions in the file. When you have completed the directions, File > Save your changes.